

A PHOTO GUIDE
THE GUIDE (IN BRIEF) ON HOW TO PHOTOGRAPH IT BEST
In recent years, photographing the Northern Lights is certainly on the wish list of many people. Admiring the Northern Lights dancing in all their splendor in the changes of color from green to red through purple, certainly creates in its viewer a certain sense of amazement. Today we live in a world where the single person wants to photograph that precise moment and share it, immediately, on his social profiles. Why not do it also with the Northern Lights, then? This simple and comprehensive guide will help you understand how to photograph it like a PRO, using the means at your disposal. Obviously the results could change even drastically, but you will surely bring home a good result and a nice "souvenir" of all respect, where friends and relatives will do nothing but compliment you.
Before delving deeper into the more specific aspects, we suggest you first read what the Northern Lights is, and don't forget to book your Northern Lights hunt!
Let's start this first part by explaining how often the equipment does not represent a limit. In photography we tend to give too much importance to the “hardware” components, ie the camera and optics. Fortunately, however, this is not always the case. To bring home a good photograph, even entry level optics or smartphones release more than decent results. On the contrary, the equipment could be important if that photograph (or even more) will be printed in large format, etc.
Having therefore clarified that any camera could work well to photograph the Northern Lights, let's start with the equipment.
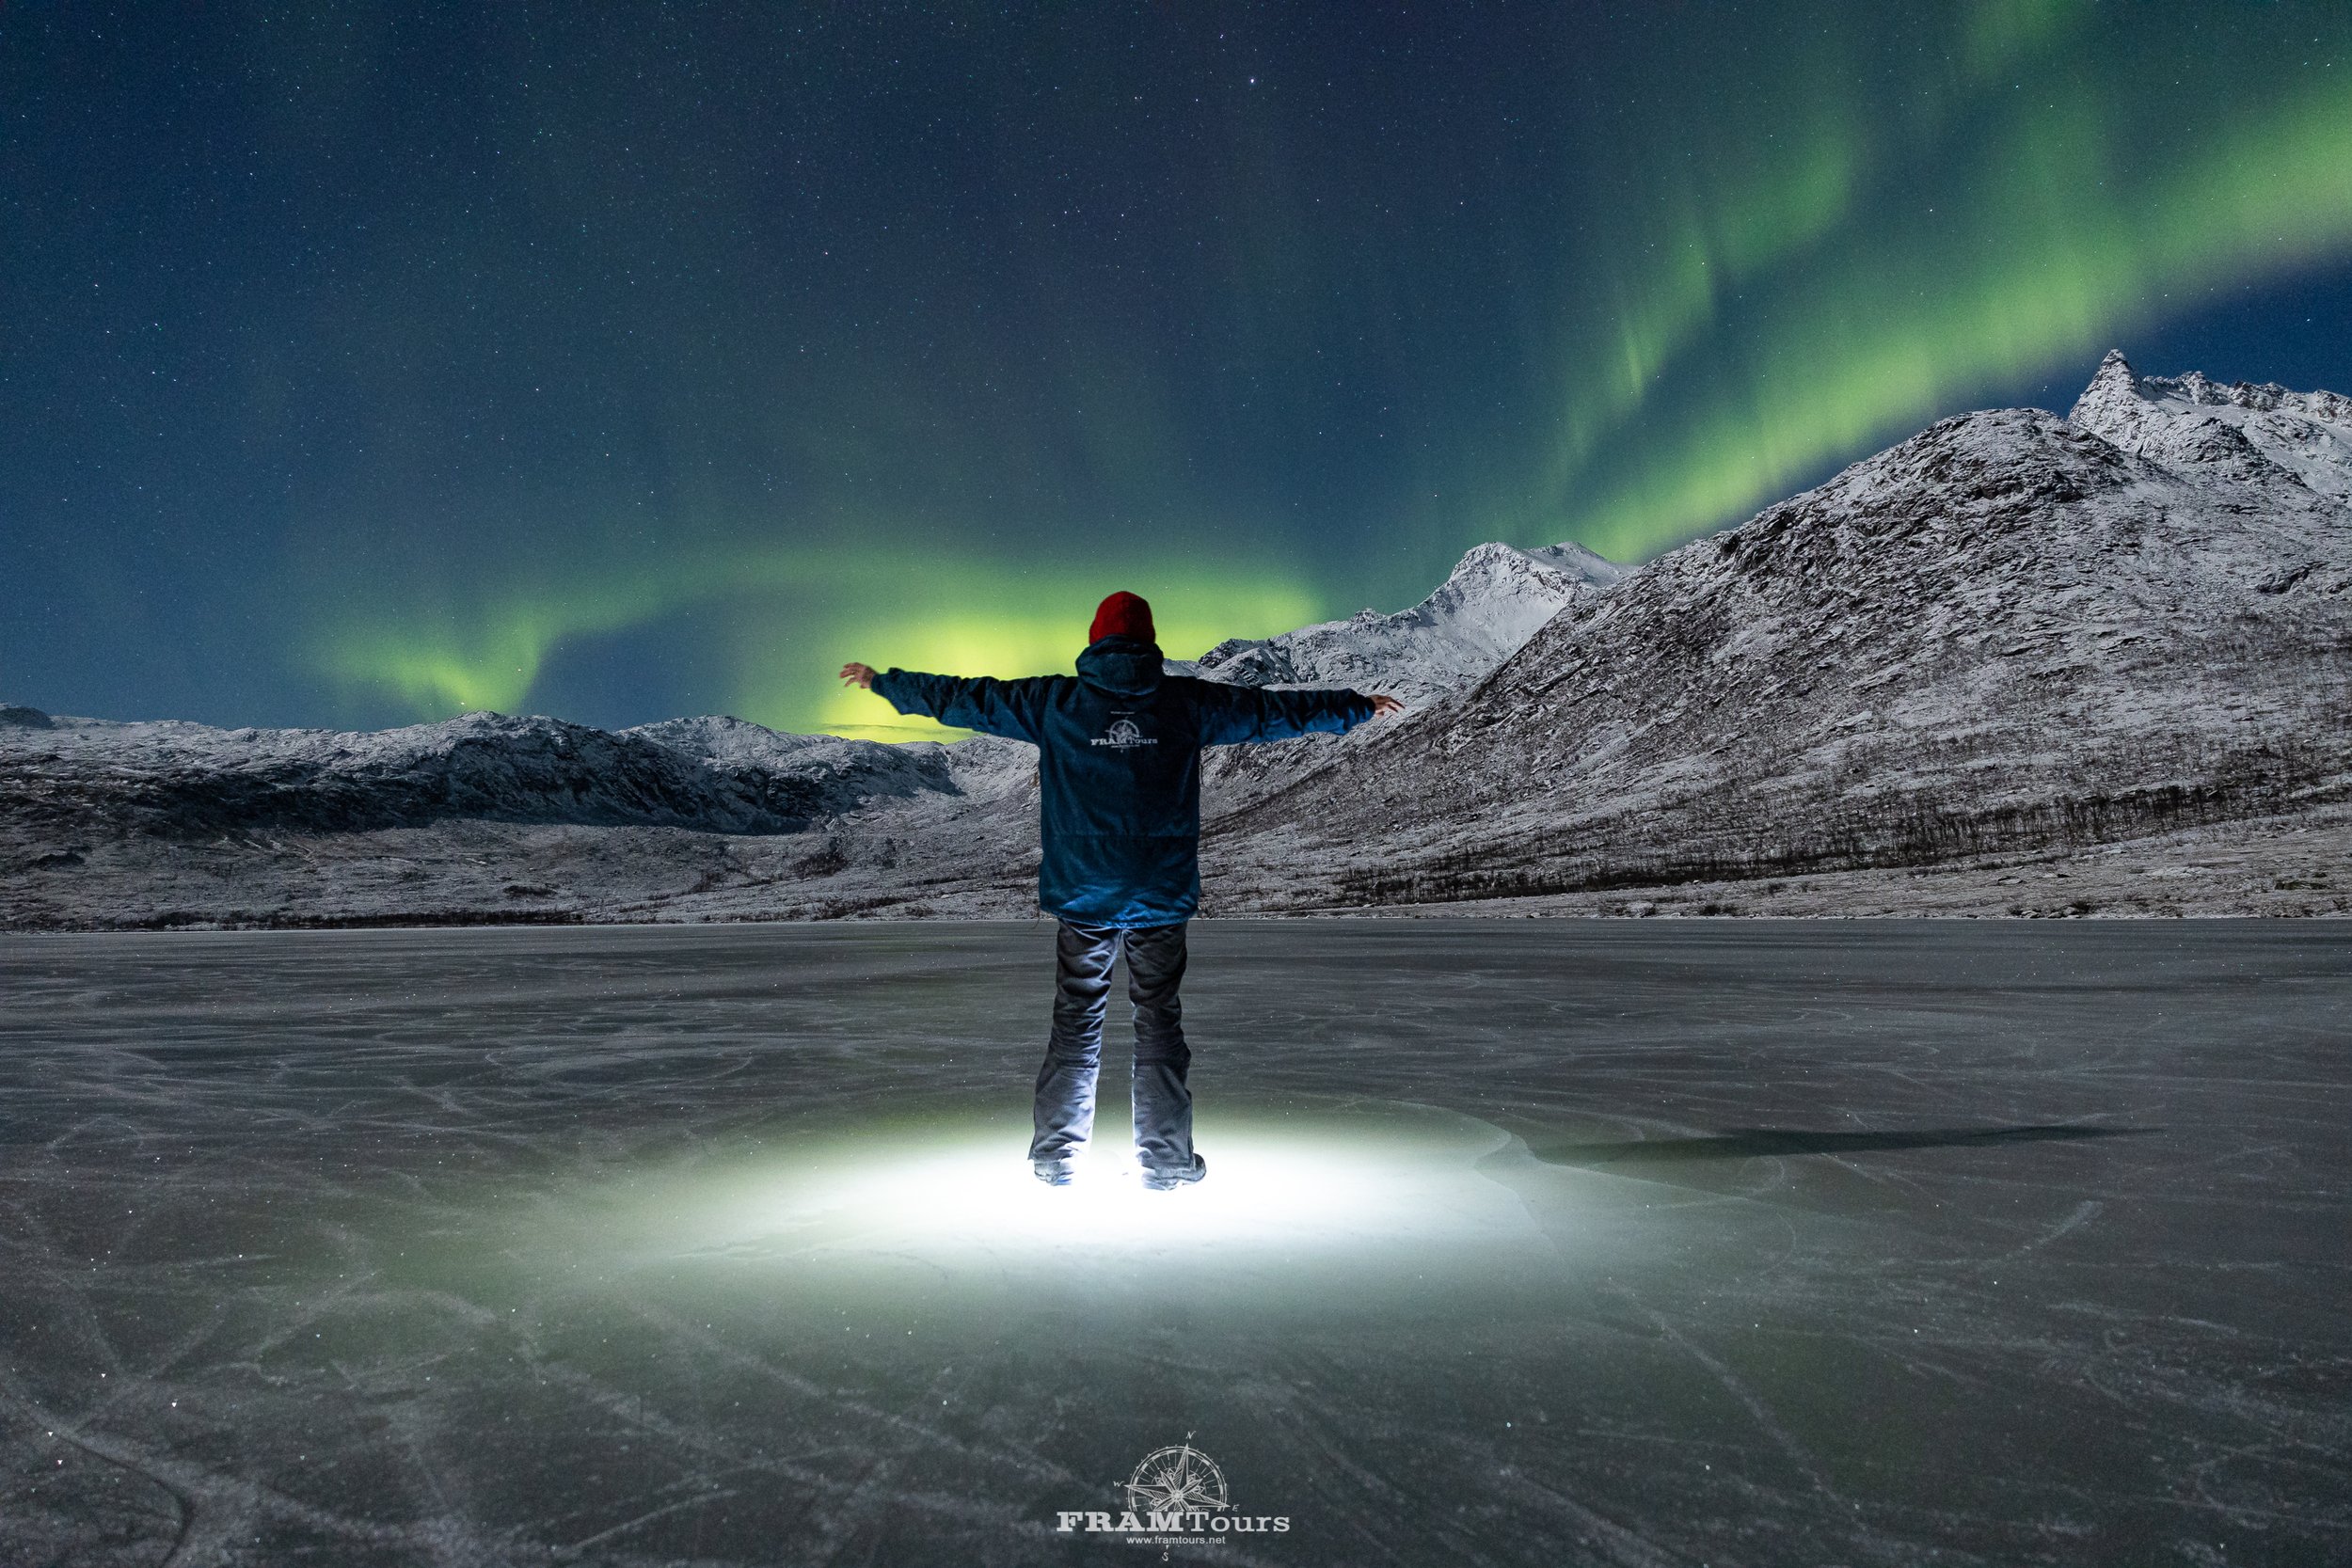
Kattfjordeidet (Nord-Norge) - CANON EOS R + Sigma 20mm f/1.4 ART DG HSM - 4”, f/1.8, ISO 1600. Tripod.
PART I: The necessary equipment
The camera:
The invaluable help of technological progress is very important for the photographer. Today even the most basic of smartphones has a fair potential from a photographic point of view, while modern entry levels in the photographic field have often made great strides.
The most important thing to know when we choose our medium to photograph the Northern Lights, is that our camera or smartphone must have the "manual shutter" function (indicated with a large M on the multifunction dial of reflex / mirrorless cameras) or PRO mode for Android smartphones.
NOTE: Not all cameras, despite having the manual mode, allow the total setting of the parameters. Not all smartphones, on the other hand, have the settable PRO mode. You are therefore advised to check with your dealer and / or instruction booklet if your camera falls within these parameters
The lenses:
On reflex and / or mirrorless, it depends on the type of photography you want to get. Surely a wide-angle lens (14mm / 16mm or 18mm) is better than a telezoom (70-200mm) because in the photography of the Northern Lights and / or landscape astrophotography, we want to frame a large portion of the sky. The wider field of view our optics have, the more aurora we will frame.
Another very important thing is that our lens should be as bright as possible: from f / 3.5 it would be acceptable. Below you can find a simple table to allow you to understand how to work between optics and ISO
Diaphragm (F/n°) ISO Range Results
F/4 From 1600 to 6400 Picture “very noisy” but acceptable
F/3.5 From 1600 to 3200 Acceptable photography with a very good compromise
F/2.8 or lower From 400 to 1600 Professional or very advanced quality photography
As for smartphones, on the other hand, there is no possibility to change the field aperture of the cameras and the diaphragm normally stands between F / 1.8 and F / 2.2.
Tripods:
It must be borne in mind that when we talk about night photography, we necessarily talk about long exposures, therefore we have the objective need to keep our camera / smartphone completely still for at least 4 ”or a few times even more. For this reason we need a tripod (photo stand). For smartphones, table tripods usually work perfectly, while for reflex or mirrorless cameras we are already talking about sustained weights (over 1.5Kg) so the more stable and robust the tripod is, the better.
NOTE: remember that to photograph the Northern Lights you will need to be outdoors, in an arctic environment during the winter. Wind, snow, ice will always be present, so the stronger it is, the more stable it will be.
Spare batteries / powerbank:
It is well known that in cold weather, batteries last less than expected, even at 100% recharge. If you are about to embark on a journey in search of the Northern Lights, remember to bring with you at least 2 additional batteries for your reflex / mirrorless camera or a handy power bank for your smartphone (especially if you use an iPhone).
NOTE: If you are using a Sony model or mirrorless cameras, we recommend at least 3 additional batteries instead as their life is very low.
Various accessories (recommended, but not mandatory):
Among these accessories we certainly mention a headlamp (possibly with red light), to illuminate your "work area" having your hands free and to disturb your hiking companions as little as possible.
Very comfortable under thermal gloves could make the difference on nights when temperatures are very low and with gloves you can not work on the settings of the cameras.
Last, but not least, a wired remote shutter release cable (no bluetooth / wireless) could help you minimize camera shake while shooting. But alternatively you still have the self-timer (2 ”will be more than enough).
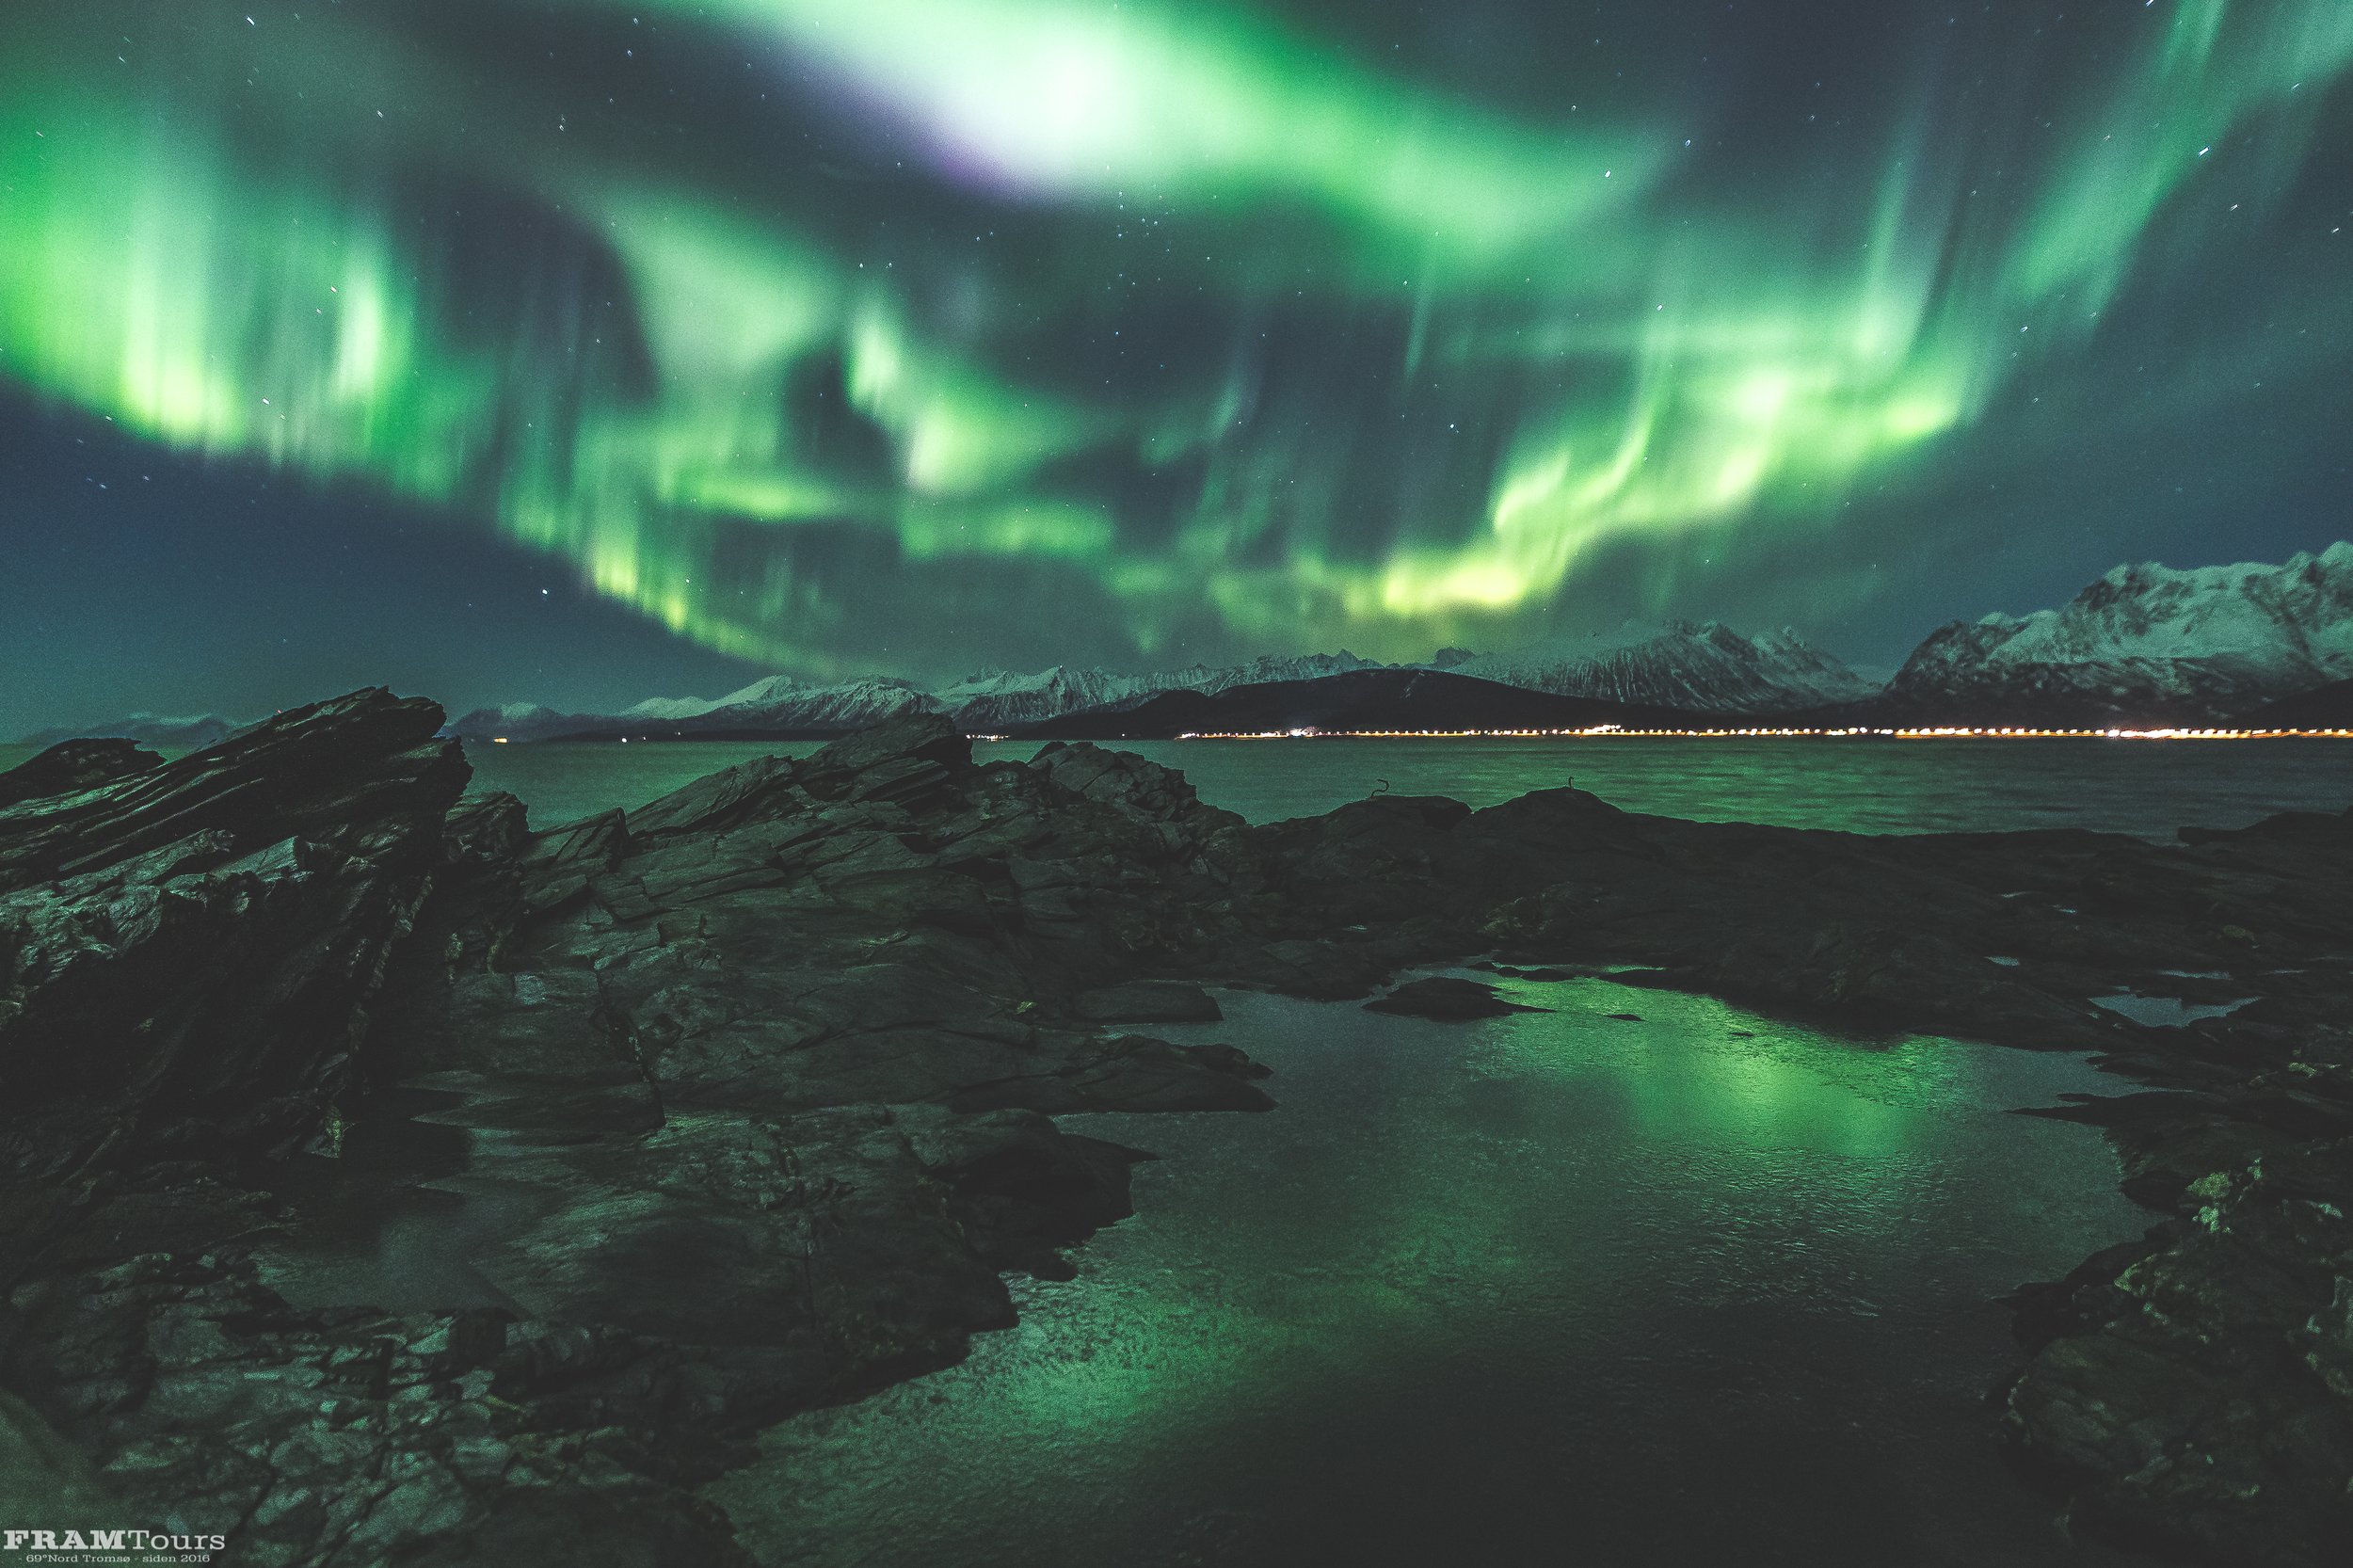
Ullsfjorden (Nord-Norge) - CANON EOS R + Sigma 20mm f/1.4 ART DG HSM - 4”, f/2.8, ISO 400. Tripod
PART II: the necessary settings
Below we will describe, step by step, what are the generic settings to best photograph the Northern Lights.
However, remember that each photograph you take will be different from the previous one and some settings may vary even considerably. For this reason we remind you that these are generic settings (which work in 95%) and, for more info and / or insights you can ask your guide, who will be happy to help you.
For DSLR / mirrorless:
1. Turn on your camera and remove the lens cover;
2. Set the camera to manual “M” mode, which can be selected from the multifunction dial or from the menu;
3. Set the shutter speed to 6 ”(not 1/6, but 6 seconds). Remember to never go below 25 ”of exposure, in order to avoid streaked stars instead of pinpoint ones;
4. Set the widest selectable aperture (F / n °) of your lens and, if you have a zoom lens, the widest field aperture (18mm or less is perfect);
5. Deselect the image stabilizer and set your lens in maual focus (AFàMF) and set the infinity symbol (∞) as the focus point;
6. For the ISO value, set at least 800. If the night is particularly dark, you could even start at 1600iso.
7. Put the camera on the tripod and position it in the direction of the starry vault;
8. If you have a remote shutter release cable, use it to take pictures, otherwise you can safely use the 2 "self-timer.
For smartphones:
1. Open the camera and select PRO mode;
2. Select at least 8 ”of exposure
3. If it were to change the aperture (very rarely) set the lowest value;
4. Set the manual focus mode and select the symbol of the two mountains for focus;
5. If you want to change the ISO value, select at least 1600;
6. Leave the smartphone on a tripod with a suitable adapter
Your cameras are now set up correctly. Modify them in part or totally, if necessary. Remember that these settings are the starting point, not the correct settings for each night and in all circumstances.

Ringvassøya - Canon EOS R3 - Canon RF 15-35mm f/2.8 L - 4”, f/2.8, ISO 800, Tripod
PART III: Clothing and accessories
Remember that you are outdoors photographing the Northern Lights and the Arctic is among the most hostile environments. Plus, you won't have much of a chance to move around to keep warm. Covering properly is a must in order to make your adventure as enjoyable as possible.
This is a small list of how we recommend dressing for our Aurora Discover, in three layers:
1. M / L T-shirt + long thermal trousers (preferably wool), light merino wool sock + wool sock;
2. Wool sweater and technical trousers (the latter better if windproof and waterproof);
3. Heavy windproof and waterproof down jacket;
4. Wool hat and fleece scarf / neck warmer,
5. Wool mittens gloves (in case of very cold nights, under gloves),
6. Reflective jacket (safety first), you must be visible in case of need
Now you have all the information you need to go with us in search of the Northern Lights with our Aurora Discover or Aurora Discover by bus tours. We are waiting for you on tour!